Pages

Wednesday, April 24, 2013

KGDB Tutorial


How to set up KGDB :
                                   The steps mentioned here are with reference to 2.6.32 kernel version.The main reason is that is KGDB is merged into linux main line from 2.6.26-RC5 kernel. For kernel version < 2.6.26-RC5, we have to get KGDB patch from http://kgdb.linsyssoft.com/kernel.htm and apply them to kernel.

Few terminology which we gonna use :

Target Machine :
                       The machine on which the source code to be debugged is present. This is the machine which is to be monitored via a remote machine using gdb on remote machine. We need the kernel configured with  KGDB and boot kernel with kgdb parameters set on this machine.

Host Machine :
                     The machine which is used to monitor the target computer. This machine requires gdb and the uncompressed kernel image of target machine.

Configure the Target Machine :
                     Get into the kernel source code.
                     $ cd /usr/src/linux/
                     $ vim .config

Enable the KGDB options

File : /usr/src/linux/.config

                   CONFIG_HAVE_ARCH_KGDB=y
                   CONFIG_KGDB=y
                   CONFIG_KGDB_SERIAL_CONSOLE=y

Recompile the kernel
                 
                    $ make menuconfig || make oldconfig
                    $ make
                    $ make modules
                    $ make modules_install
                    $ make install

After kernel recompilation, transfer the uncompressed image of kernel i.e. vmlinux to the host
machine. Before doing scp you should boot host machine. Copy kernel image at /boot/ directory.

                    $ cd /usr/src/linux/
                    $ scp vmlinux  /boot/
                 

Edit the grub entry of target machine, add kgdb parameters

File: /etc/grub.conf
                 
  title Scientific Linux (2.6.32-131.17.1-lustre)
         root (hd0,0)      
         kernel /boot/vmlinuz-2.6.32-131.17.1-lustre ro root=UUID=85149a02-7fb9-4eb2-a780-c2abe3e4b0a1 rd_NO_LUKS rd_NO_LVM rd_NO_MD rd_NO_DM LANG=en_US.UTF-8 SYSFONT=latarcyrheb-sun16 KEYBOARDTYPE=pc KEYTABLE=us  kgdbwait kgdboc=ttyS1,115200 rhgb quiet
        initrd /boot/initramfs-2.6.32-131.17.1-lustre.imgNG=en_US.UTF-8

Working with KGDB:
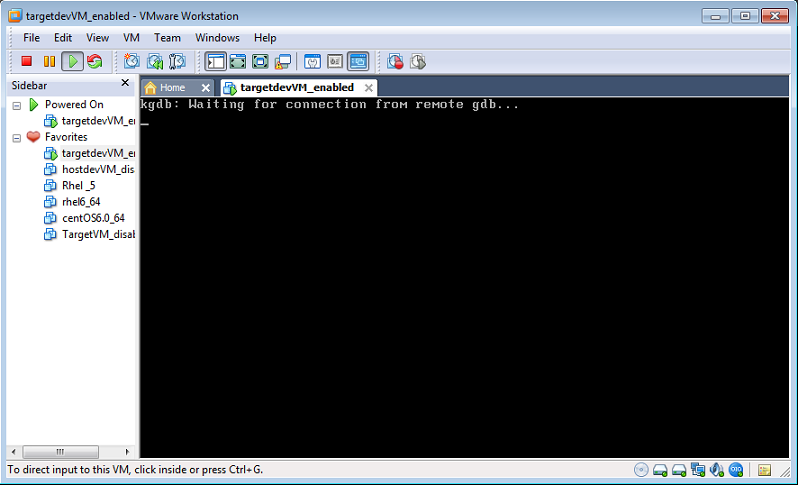
             Boot target machine: Target machine should wait for host machine to connect.


Configuring named pipe to connect two VM's over serial port :
         On host machine :
                      Named pipe configuring should  look something like below :


         On target machine :
                      Named pipe configuring should  look something like below :

    
 Boot host machine : Connect target machine after boot process is over.
               On host Machine :
                       $ cd /boot/
                       $ gdb ./vmlinux
                                 Pass kernel image file of target machine.
                       $ gdb> target remote /dev/ttyS1
                                 This will establish communication between target and host machine.
                                 Both machine are connected via serial port and device name is /dev/ttyS1.
                                 It may vary. So, before working on kgdb you can verify which serial port is working
                                 You can use "minicom" (a linux tool) to check which serial port is active. 
                       $ gdb> cont   
                                 This will continue the boot process of target machine.
             On target machine :
                                $  echo "g"  >  /proc/sysrq-trigger
                                This will regain gdb session on the host machine. And now we can set
                                 breakpoints and continue debugging.
                                This will hang the session on your target machine, continuing gdb session on host
                                will invoke the session on target machine. If you are using putty to connect with target
                                machine, you will have to restart the session.
        Adding symbols for loadable modules :
                On target machine :
                                 Load the modules and copy symbols of various segments of our program
                                 $ insmod  your_module
                                                or
                                 $ modprobe  your_module
                                 $cd /sys/module/your_module/sections
                                 $ cat .text
                                 $ cat .bss
                                 $ cat .data
                                 $ cat .rodata
               On host machine :
                                  $ gdb> add-symbol-file  module_name_with complete_path  \
                                              text_segment_address \
                                             -s .bss    bss_segment_address \
                                             -s .rodata   rodata_segment_address \
                                             -s .data    data_segment_address
                                  Now we can set break points even in  our modules.
                                  $ cont
                                  Continuing gdb session will revoke target machine session.
                                  We can perform various action on target machine inorder to hit the breakpoint on
                                  machine.
                                  
                   
        Note:
                   Use gdb 6.8 , gdb 7 has some issue while working with kgdb.
                   While working with kgdb, if you are not able to set break points in the kernel code,
                   check for the  CONFIG_DEBUG_RODATA in the .config file.  
                    Disable CONFIG_DEBUG_RODATA and recompile your kernel and then try again.
                 
                    If  you are not able to step in to the function, try using new gdb version 7.5 on both machine.
 

Sunday, July 29, 2012

Facebook's Flashcache

Facebook's Flashcache:

 Use some Flash storage on existing servers
 Simple to deploy and use
 IO access patterns benefit from a cache

Introduction

  • Block cache for Linux - write back and write through modes
  • Layered below the filesystem at the top of the storage stack
  • Cache Disk Blocks on fast persistent storage (Flash, SSD)
  • Loadable Linux Kernel module, built using the Device Mapper (DM)
  • Primary use case InnoDB, but general purpose
  • Based on dm-cache by Prof. Ming

Caching Modes

Write Back                                                                                Write Through

  • Lazy writing to disk                                                          Non-persistent
  • Persistent across reboot                                                   Are you a pessimist
  • Persistent across device removal

Cache Structure

  • Set associative hash
  • Hash with fixed sized buckets (sets) with linear probing within a set
  • 512-way set associative by default
  • dbn: Disk Block Number, address of block on disk
  • Set = (dbn / block size / set size) mod (number of sets)
  • Sequential range of dbns map onto a single sets

Structure


Write Back

  • Replacement policy is FIFO (default) or LRU within a set
  • Switch on the fly between FIFO/LRU (sysctl)
  • Metadata per cache block: 24 bytes in memory, 16 bytes on ssd
  • On ssd metadata per-slot
  • In memory metadata per-slot:


Write Through

  • Replacement policy is FIFO
  • Metadata per slot
  • 17 bytes (memory), no metadata stored on ssd
  • In memory metadata per-slot


Reads

  • Compute cache set for dbn
  • Cache Hit
  • Verify checksums if configured
  • Serve read out of cache
  • Cache Miss
  • Find free block or reclaim block based on replacement policy
  • Read block from disk and populate cache
  • Update block checksum if configured
  • Return data to user

Write Through - writes

  • Compute cache set for dbn
  • Cache hit
  • Get cached block
  • Cache miss
  • Find free block or reclaim block
  • Write data block to disk
  • Write data block to cache
  • Update block checksum

Write Back - writes

  • Compute cache set for dbn
  • Cache Hit
  • Write data block into cache
  • If data block not DIRTY, synchronously update on-ssd cache metadata to mark block DIRTY
  • Cache miss
  • Find free block or reclaim block based on replacement policy
  • Write data block to cache
  • Synchronously update on-ssd cache metadata to mark block DIRTY

Small or uncacheable requests

  • First invalidate blocks that overlap the requests
  • There are at most 2 such blocks
  • For Write Back, if the overlapping blocks are DIRTY they are cleaned first then invalidated
  • Uncacheable full block reads are served from cache in case of a cache hit.
  • Perform disk IO
  • Repeat invalidation to close races which might have caused the block to be cached while the disk IO was in progress

Write Back policy

  • Default expiration of 30 seconds (work in progress)
  • When dirty blocks in a set exceeds configurable threshold, clean some blocks
  • Blocks selected for writeback based on replacement policy
  • Default dirty threshold 20%. Set higher for write heavy workloads
  • Sort selected blocks and pickup any other blocks in set that can be contiguously merged with these
  • Writes merged by the IO scheduler

Write Back – cache metadata overhead

  • In-Memory cache metadata memory footprint
  • 300GB/4KB cache -> ~1.8GB
  • 160GB/4KB cache -> ~960MB
  • Cache metadata writes/file system write
  • Worst case is 2 cache metadata updates per write
  • (VALID->DIRTY, DIRTY->VALID)
  • Average case is much lower because of cache write hits and batching of cache metadata updates

Write Through – cache metadata overhead

  • In-Memory Cache metadata footprint
  • 300GB/4KB cache -> ~1.3GB
  • 160GB/4KB cache -> ~700MB
  • Cache metadata writes per file system write
  • 1 cache data write per file system write

Write Back – metadata updates

  • Cache (on-ssd) metadata only updated on writes and block cleanings
  • (VALID->DIRTY or DIRTY->VALID)
  • Cache (on-ssd) metadata not updated on cache population for reads
  • Reload after an unclean shutdown only loads DIRTY blocks
  • Fast and Slow cache shutdowns
  • Only metadata is written on fast shutdown. Reload loads both dirty and clean blocks
  • Slow shutdown writes all dirty blocks to disk first, then writes out metadata to the ssd. Reload only loads clean blocks.
  • Metadata updates to multiple blocks in same sector are batched

Torn Page Problem

  • Handle partial block write caused by power failure or other causes
  • Problem exists for Flashcache in Write Back mode
  • Detected via block checksums
  • Checksums are disabled by default
  • Pages with bad checksums are not used
  • Checksums increase cache metadata writes and memory footprint
  • Update cache metadata checksums on DIRTY->DIRTY block transitions for


Write Back

Each per-cache slot grows by 8 bytes to hold the checksum (a 33% increase from 24 bytes to 32 bytes for the Write Back case).


Cache controls for Write Back

  • Work best with O_DIRECT file access
  • Global modes – Cache All or Cache Nothing
  • Cache All has a blacklist of pids and tgids
  • Cache Nothing has a whitelist of pids and tgids
  • tgids can be used to tag all pthreads in the group as cacheable
  • Exceptions for threads within a group are supported
  • List changes done via FlashCache ioctls
  • Cache can be read but is not written for non-cacheable tgids and pids

Cache Nothing policy

  • If the thread id is whitelisted, cache all IOs for this thread
  • If the tgid is whitelisted, cache all IOs for this thread
  • If the thread id is blacklisted do not cache IOs


Utilities

flashcache_create
flashcache_create -b 4k -s 10g flashcache /dev/flash /dev/disk
flashcache_destroy
flashcache_destory /dev/flash
flashcache_load
sysctl –a | grep flash

dev.flashcache.cache_all
dev.flashcache.fast_remove
dev.flashcache.zero_stats
dev.flashcache.write_merge
dev.flashcache.reclaim_policy
dev.flashcache.pid_expiry_secs
dev.flashcache.max_pids
dev.flashcache.do_pid_expiry
dev.flashcache.max_clean_ios_set
dev.flashcache.max_clean_ios_total
dev.flashcache.debug
dev.flashcache.dirty_thresh_pct
dev.flashcache.stop_sync
dev.flashcache.do_sync 


Status

cat /proc/flashcache_stats


Removing FlashCache

umount /data
dmesetup remove flashcache
flashcache_destroy /dev/flash


Resources

▪ GitHub : facebook/flashcache


Wednesday, June 13, 2012

Overview of the LSM and SELinux internal structure and workings

Major areas covered are:

  • How the LSM and SELinux modules work together.
  • The boot sequences that are relevant to SELinux. 

LSM Module:

The LSM is the Linux security framework that allows 3rd party access control mechanisms to be linked into the GNU / Linux kernel. Currently there are two 3rd party services that utilize the LSM: SELinux and SMACK (Simplified Mandatory Access Control Kernel) that both provide mandatory access control services.

 The basic idea behind the LSM is to: 

  • Insert security function calls (or hooks) and security data structures in the various kernel services to allow access control to be applied.
  • Allow registration and initialization services for the 3rd party security modules.  
  • Allow process security attributes to be available to user-space services by extending the /proc filesystem 
  • with a security namespace.
  • Support filesystems that use extended attributes.
  • Consolidate the Linux capabilities into an optional module. 
Note: LSM does not provide any security services itself, only the hooks and structures for supporting 3rd party modules. If no 3rd party modules is loaded, the capabilities module become the default module thus allowing standard DAC.

Kernel services for which LSM has inserted hooks and structures to allow access control managed by 3rd party module:

Program Execution                        Filesystem Operations                       Inode Operations

File operations                                 Task operations                                     Netlink messeging
Unix domain networking                   Socket operations                                 XFRM operations
Key management operations            IPC operations                                      Memory Segments
Seamaphores                                  Capability                                              Sysctl
Syslogs                                           Audit

Major kernel source that form LSM: 

capabilty.c
commoncap.c
device_cgroup.c
inode.c
root_plug.c
security.c

SELinux Module:

Diagrams briefly explains how various kernel modules fit together :


SELinux Boot Process:


The Role of Policy in the Boot Process

SELinux plays an important role during the early stages of system start-up. Because all processes must be labeled with their correct domain, init performs some essential operations early in the boot process to maintain synchronization between labeling and policy enforcement.
  1. After the kernel has been loaded during the boot process, the initial process is assigned the predefined initial SELinux ID (initial SID) kernel. Initial SIDs are used for bootstrapping before the policy is loaded.
  2. /sbin/init mounts /proc/, and then searches for the selinuxfs file system type. If it is present, that means SELinux is enabled in the kernel.
  3. If init does not find SELinux in the kernel, or if it is disabled via the selinux=0 boot parameter, or if /etc/selinux/config specifies that SELINUX=disabled, the boot process proceeds with a non-SELinux system.
    At the same time, init sets the enforcing status if it is different from the setting in /etc/selinux/config. This happens when a parameter is passed during the boot process. The default mode is permissive until the policy is loaded, then enforcement is set by the configuration file or by the parameters enforcing=0 or enforcing=1.
  4. If SELinux is present, /selinux/ is mounted.
  5. The kernel checks /selinux/policyvers for the supported policy version. init instpects /etc/selinux/config to determine which policy is active, such as the targeted policy, and loads the associated file at $SELINUX_POLICY/policy..
    If the binary policy is not the version supported by the kernel, init attempts to load the policy file if it is a previous version. This provides backward compatibility with older policy versions.
    If the local settings in /etc/selinux/targeted/booleans are different from those compiled in the policy, init modifies the policy in memory based on the local settings prior to loading the policy into the kernel.
  6. By this stage of the process, the policy is fully loaded into the kernel. The initial SIDs are then mapped to security contexts in the policy. In the case of the targeted policy, the new domain is user_u:system_r:unconfined_t. The kernel can now begin to retrieve security contexts dynamically from the in-kernel security server.
  7. init then re-executes itself so that it can transition to a different domain, if the policy defines it. For the targeted policy, there is no transition defined and init remains in the unconfined_t domain.
  8. At this point, init continues with its normal boot process.


Start Kernel Boot Process
|
./init/main.c start_kernel()
|
Load the initial RAM Disk (this is a temporary root filesystem). The source
code for this and nash(8) is in the mkinitrd source code.
|
Kernel calls security_init() to initialise the LSM security framework.
For SELinux this results in a call to selinux_init() that is in hooks.c
|
Set the kernel context to the initial SID value "1" taken from
include/flask.h (SECINITSID_KERNEL)
|
The AVC is initialised by a call to avc_init()
|
Other areas of SELinux get initialised such as the
selinuxfs (/selinux) pseudo filesystem and netlink with their
objects set with the initial SIDs from flask.h
|
/sbin/nash is run by the kernel.
|
/sbin/nash initialises services such as drivers, loads the root filesystem
read-only and loads the SELinux policy using the loadPolicyCommand.
This function will check various directories, then call the SELinux API
the selinux_init_load_policy function to load the policy.
|
Loading the policy will now complete the SELinux initialisation
with a call to selinux_complete_init() in hooks.c.
SELinux will now start enforcing policy or allow permissive access
depending on the value set in /etc/selinux/config SELINUX=
|
The kernel is now loaded, the RAM disk removed, SELinux is
initialised, the policy loaded and /sbin/init is running
with the root filesystem in read only mode.
|
End Kernel Load and Initialisation
|
/etc/rc.d/sysinit is run by init that will:
|
mount /proc and sysfs filesystems
|
Check that the selinuxfs (/selinux) pseudo filesystem
is present and whether the current process is labeled kernel_t
|
If the current SELinux state can be read (/selinux/enforce),
then set to value. If cannot read, set to "1".
|
Run restorecon -R on /dev if needed.
|
Kill off /sbin/nash if it is still running.
|
Run restorecon on /dev/pts if needed.
|
Set contexts on the files in /etc/rwtab and /etc/statetab
by running restorecon -R path.
|
Check if relabeling required:
if ./autorelabel file + AUTORELABEL=0 (in /etc/selinux/config):
then drop to shell for manual relabel, or
if only ./autorelabel file, then run fixfiles -F restore.
|
remove ./autorelabel file.
|
If /sbin/init has changed context after the relabel,
then ensure a reboot. ELSE carry on.
|
/etc/rc.d/sysinit will do other initialisation tasks, then exit.
|
Note: Some SELinux notes state that /sbin/init is re-exec"ed
to allow it to run in the correct context. Could not find where this
happened as policy seems to be active before init daemon is run ??
|
Initialisation Complete


References :

                         http://selinuxproject.org/page/NB_LSM
                         http://www.nsa.gov/research/_files/publications/implementing_selinux.pdf